
- Видео 180
- Просмотров 2 371 744
Kaki DIY
Малайзия
Добавлен 7 апр 2014
Welcome to KakiDIY, your go-to hub for all things DIY, repair, and unboxing! Whether you're a seasoned DIY enthusiast or just starting out, our channel is here to inspire, educate, and empower you to tackle projects on your own.
What We Offer:
DIY Projects: Step-by-step guides on a variety of DIY projects, from simple crafts to complex builds.
Repair Tutorials: Detailed instructions on how to fix and maintain your gadgets, appliances, and more.
Unboxing: First looks and reviews of the latest DIY tools and products to help you make informed decisions.
Fix Hacks: Creative solutions and hacks to common problems, saving you time and money.
Join our community of DIY buddies and let's build, repair, and create together!
Stay Connected:
www.kakidiy.com
kakidiy
groups/kakirepair/
Subscribe now and hit the bell icon so you never miss a video!
Proper Bicycle Hydraulic Brake Bleeding in 5 mins
Brake bleeding can be messy and if done wrong creating spongy braking experience and can be dangerous. We show you how to DIY hydraulic brake bleeding using cheap brake bleeding kits available online.
This bike is using Shimano M575 hydraulic brakes which is using Mineral Oil.
This bike is using Shimano M575 hydraulic brakes which is using Mineral Oil.
Просмотров: 382
Видео


How to attach shoe sole with Vtech Contact Adhesive the right way.
Просмотров 1,1 тыс.28 дней назад
Many people made crucial mistake while handling Contact Adhesive or Rubber Cement. In this step-by-step guide, learn how to easily fix a shoe sole using Vtech (Vital Technical) Contact Adhesive. Whether you have a loose sole or a worn-out shoe, this tutorial will walk you through the process of applying contact adhesive to securely reattach the sole. Say goodbye to shoes falling apart with this...

Fix iMovie Error! "This item cannot be shared while it is still referencing media on the camera"
Просмотров 313Месяц назад
Learn how to easily fix the iMovie export error "This item cannot be shared while it is still referencing media on the camera" with this quick tutorial! In this video, we walk you through the steps to resolve this common issue, allowing you to share your videos hassle-free. Say goodbye to the frustration of encountering this error message and start sharing your iMovie creations effortlessly. Wa...
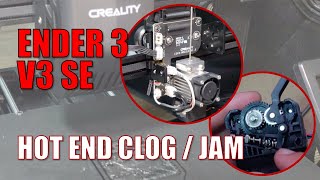
Fixing Creality Ender 3 V3 SE Hot End JAM - Disassembly & Unclog
Просмотров 2,9 тыс.Месяц назад
KakiDIY delve into the troubleshooting and repair process of a jammed hot end on the Creality Ender 3 V3 SE 3D printer. We will guide you through the step-by-step disassembly of the direct drive extruder to access the hot end and demonstrate how to effectively unclog it. Whether you are a beginner or experienced with 3D printers, this detailed tutorial will help you address hot end jams and get...

Refill printer ink cartridge the right way and save money
Просмотров 1,2 тыс.Месяц назад
Learn how to refill printer ink cartridges the right way and save money! Follow these steps to refill HP 680 ink cartridge or any Inkjet/Bubblejet printer ink. Do not overfill the ink as well. This video, we are filling up the 680 HP cartridge with only 4ml ink tank for each colour.

Is Ender 3 V3 SE noisy? sound check vs Ender 3 v1
Просмотров 368Месяц назад
How loud is the Ender 3 V3 SE noise? Let's compare it with Ender 3 V1 32 bit's noise levels in this video. To find the noise level of Ender 3 V1 8bit vs V1 32bit vs Ender 3 V2, check out our older video. ruclips.net/video/MQ0cb8Q0CiE/видео.html We ordered our printers from Cytron : my.cytron.io/c-3d-modeling/c-3d-printer

Creality Ender 3 V3 SE Installation Setup Guide for perfect consistent prints
Просмотров 2,8 тыс.Месяц назад
We take you through an in-depth unboxing and installation process for the Creality Ender 3 V3 SE 3D printer. Unlike the standard installation guide, our step-by-step instructions include tips, tricks, and essential do's and don'ts to ensure you get perfect prints from the start. I got this printer from Cytron : my.cytron.io/creality-ender-3-v3-se-3d-printer-bundle01 What You'll Find in This Vid...

Creality 3D Printer Enclosure: Unboxing, Setup, and placing filament dryer inside!
Просмотров 463Месяц назад
Creality 3D Printer Enclosure: Unboxing, Setup, and placing filament dryer inside!

3D printed Filament Guide! STOP WOBBLE + Change Spool location!
Просмотров 661Месяц назад
3D printed Filament Guide! STOP WOBBLE Change Spool location!
Revive Your Creality Ender 3 V1: 15 Tips for Longevity in 2024
Просмотров 2,1 тыс.Месяц назад
Revive Your Creality Ender 3 V1: 15 Tips for Longevity in 2024
Unbox & Install Raspberry Pi 5: Compatible Active Cooler & 3D printed case
Просмотров 1,3 тыс.Месяц назад
Unbox & Install Raspberry Pi 5: Compatible Active Cooler & 3D printed case
How to Easily Replace Your Casio Watch Battery - Step-by-Step : Casio BabyG BG5601-1
Просмотров 552Месяц назад
How to Easily Replace Your Casio Watch Battery - Step-by-Step : Casio BabyG BG5601-1
Casio Watch Battery Replacement MODULE 1330 MODEL LQ139 #casio #watchbattery
Просмотров 2032 месяца назад
Casio Watch Battery Replacement MODULE 1330 MODEL LQ139 #casio #watchbattery
Polish your car with Bosch Polisher GPO 12 CE Professional - Unboxing, Setup & Review
Просмотров 5092 месяца назад
Polish your car with Bosch Polisher GPO 12 CE Professional - Unboxing, Setup & Review
Is the $55 Bosch EasyShear garden tool worth it? Detailed unbox, review and tips
Просмотров 1,5 тыс.2 месяца назад
Is the $55 Bosch EasyShear garden tool worth it? Detailed unbox, review and tips
FIX HACK DIY: Gas Stove Cut Off, Yellow Flames & Safety
Просмотров 3,1 тыс.2 месяца назад
FIX HACK DIY: Gas Stove Cut Off, Yellow Flames & Safety
From Dusk to Night: Mesmerizing Drone Footage Over Hoi An Ancient City
Просмотров 1442 месяца назад
From Dusk to Night: Mesmerizing Drone Footage Over Hoi An Ancient City
Electric Skateboard Remote Battery Replacement
Просмотров 2602 месяца назад
Electric Skateboard Remote Battery Replacement
Discover Ba Na Hills: A Spectacular Drone Journey through Da Nang's Hidden Gems in 4K
Просмотров 6302 месяца назад
Discover Ba Na Hills: A Spectacular Drone Journey through Da Nang's Hidden Gems in 4K
Mercedes Benz E-Class W211 Brake Bulb Error, diagnose and fix
Просмотров 1,2 тыс.2 месяца назад
Mercedes Benz E-Class W211 Brake Bulb Error, diagnose and fix
Rescue electronic appliances after flood with WD40
Просмотров 1624 месяца назад
Rescue electronic appliances after flood with WD40
WD40 Roadshow at MR DIY Plus Midvalley Megamall x KakiDIY and KakiRepair
Просмотров 2734 месяца назад
WD40 Roadshow at MR DIY Plus Midvalley Megamall x KakiDIY and KakiRepair
3M Scotch® Extreme Double Sided Mounting Tape
Просмотров 26 тыс.10 месяцев назад
3M Scotch® Extreme Double Sided Mounting Tape
FIXHACKDIY - Single speed bike tire change - wheel removal 16" tube replacement
Просмотров 1,4 тыс.Год назад
FIXHACKDIY - Single speed bike tire change - wheel removal 16" tube replacement
FIX HACK DIY - Fix darkened LCD screen for remote, calculator displays
Просмотров 27 тыс.Год назад
FIX HACK DIY - Fix darkened LCD screen for remote, calculator displays
Controlling a BOSCH AHM38 Hand Mower with ease. Tips and Tricks
Просмотров 27 тыс.Год назад
Controlling a BOSCH AHM38 Hand Mower with ease. Tips and Tricks
BOSCH AHM38 Hand Mover Unbox, Setup, Tune, Calibrate with Tips and Tricks
Просмотров 26 тыс.Год назад
BOSCH AHM38 Hand Mover Unbox, Setup, Tune, Calibrate with Tips and Tricks
Petrosains RBTX Challenge 2022 (Featuring Motive Robotic Kit)
Просмотров 4112 года назад
Petrosains RBTX Challenge 2022 (Featuring Motive Robotic Kit)
excellent instructions, i haven't had a clog yet since 8 months of ownership but this is a great resource to have on hand should the problem eventually arise. thanks.
Thank You for your comments. You must have given lots of care and attention to the printer and feeding it good quality filaments... thanks for watching !
Wow!!! Thank u!!!!
In India from where it can be purchased, the show room names ...
Am sorry, we are from Malaysia. Am sure online shopping platforms and major gardening tool shops will have them. Apologize as am not familiar with market landscape in India. Will want to visit India soon one day
@@KakiDIY Thanks a lot 🙏
what kind of screws does the heatsinks fan use?
Thank you so much I tried many things before and was about to buy a new sensor but this worked 🙏
Happy this helped. Had the same issue last time with BL Touch and found this fix worked across 6 other printers I had..
Can use as sander or not
With the sanding attachment, it can, although not designed for it. But do clean the machine up properly before using it as a polisher again.
Thanks, u video was very usefull!!
Glad to hear that! Thank You
Great video! Although you should never try to move any motor quickly causing them to generate electricity that feeds back to the main board and can fry the board. I've done that very thing my first printer. Move slowly. Newer boards have feedback circuitry to prevent this. I didn't believe yours does since I saw you LCD screen light up. Great video, I was thinking of snagging a used Ender 3 with a fried main board for$50. Easy fix
Thanks for the comment and great tip!! I will be mindful next time. Cheers...
So 20 minutes in to me following this "15 minute setup" and you're telling me that "step 1" was in fact wrong 😂 and I've gotta unscrew the only things I've screwed in lol. Anyway thanks for your guide! I certainly couldn't follow theirs 😅
Hahahah the explanation video made it long.. took less than 15mins once familiarized.. took lots of trial and errors to get this, now am churning out printers like an assembly line. Hahhahha. Thanks for the comment.
Thank you brother i have just bought the same 3d printer and its working amazing after your guide on how to assemble
Thank You for the comment.. enjoy the printer !!
My Elba stove got 2 big and 1 small burners. All 3 also cant start up all a sudden. Totally no spark & no sound when turn the knob. Gas tank is full. Change to new battery still no sound and no spark at all. Please assist.
Thank you for sharing 🙂
Really nice valuable information Thank you sir 👍
Thank You
Some idiot put some kind of glue on the cables that connect the cr touch and hot end…
Yeah that's standard for Creality. Just use some needle nose pliers. Comes off pretty easy.
@@dailyprofitcenterAh, thanks for the tip mate! I’ll be sure to try that next time I open my printer up.
Same with this one. We left it untouch ..
@@KakiDIY Yeah, I saw that in your video after I rewatched it.
Man its impossible to remove nozzle head. its not turning like yours. What will i do now? its looking damaged now.
Ohuh... I find it easier to remove when the hot end is heated up. Heat it up to 250.. and try it ?
@@KakiDIY yea i tried to remove without heating first but it was already damaged when i heat it. I just bought new hot end.
good decision, i have the same printer and is very good
Same
good decision, i have the same printer and is very good
I have a small tube that fell when I changed the nozzle, what can I do?
Just put back the tube. It is a heat break PTFE tubing that is from the dame diameter as a Bowden tube. If you lost it, just get a bowden tube like Capricorn, cut it to length and replace it.
I have small one and its damn loud, really surprised bigger one was quieter
Yeah the big one uses a different piston technology
I thought wd40 is bad for 3d printers
Don't use the WD40 multipurpose blue can. Use specific WD40 Specialists
V1 power supply fan is obnoxiously loud. Swapping out the fans and motherboard made it so much quieter
Yeah. Nice work
Great Video
Thank You !!
I learned a lesson: the socket cap head screws fixing the two halves of the extruder will bore straight through if the stepper motor isn’t screwed in to the back first. Weird design choice, they should probably have used a washer or truss screw on the surface.
Yeah. Many things can be improved in this. Hope the manufacturers are watching the comments.
This is wrong. The thermal Pads should follow the Official Pi Cooler's pad placement, as it is clearly modeled after the official cooler. The thermal pads should be covering the CPU, Wifi Module (Shiny Rectangle) and Power Management Circuit. Ram and RP1 do not generate enough heat to require extra cooling and as such, a direct thermal connection from them to the heatsink will only subject them to further heat stress from the much hotter CPU (Thermal Conductance is a 2 way street.)
Thanks for an easy to understand tutorial. I didn't recieve the red nozzle. Have they changed it now?
Brilliant video.
My v3 SE has gotten into the habit of clogging at the end of every print. I use mainly PLA, and the clog turns up in the same place as you've shown in this video. What I do to unclog is preheat TPU, use a candle to heat up the tip of the cleaning rod and push it in and through the clog, then burn off the residue that sticks to the rod. Repeat about twice more until I can't feel anything impeding the movement of the rod and all is well and I can print again. My problem now is just the fact that it clogs after EVERY print.
Good tip.. Thanks !
Using a silicone spray for garage hinges worked for me. Thanks for the helpful tip.
Thank you so much for this info. Very helpful!❤
AHHHH🎉🎉🎉 I tried so many videos, this is the only one that worked for me and my situation THANK YOU
Edit: Turn the fracking thing off of 230v behind the printer if you are in Canada or America...
What would happen
Sigh. I just bought this, returned it and bought another. Neither one will 'level' as yours did.
Ah.. the CR Touch not functioning?
Check your watt power slide on the back of the printer. Make sure your at 115 if you live in the US. I have a friend that bought one of these and had the switch on the wrong side. His did the exact same thing you are mentioning. Slow movement, and then getting stuck on the leveling part.
KakiDiy what kind of paint to use if our bicycle paint came out by little pint
Enamel based paint would be great for daily used bike. Use any sprayed on ones will do.
thank you brother, i appreciate you !
Does this works good on home theater receivers because I use contact cleaner on a home theater receiver, circuit board. I had to open it up and clean off all the parts of the home theater receiver and it was working like brand new. It is safe to use on home theater receiver this particular spray bottle.? like a Sony home receiver, a RCA, or a stereo system receiver
Yes it does. Used it in a Marantz amplifier recently ... removed some buzzing sounds 👌
I bought China tube type contact adhesive with needle tip,the instruction said need sand the surface of the part need to be glued together.Dunno apply or not lol.
Yeah, sanding or brushing with a rough metal brush will help with better bonding.
Very helpful, thank you!
didnt know need to wait till dry touch, i have been doing it wrong
Yeah. Contact Adhesive can't stick if they are still wet.
I wish I saw this before throwing out my old shoes with koyak soles.. 😅
En qué tienda de Perú puedo comprar la dremel
great video, but I have a question, here in the auto leveling, it shows me numbers of negative 0 and positive 0, with majority of it green boxes and on the further sides are blue, is it normal?
It is normal to have different mix if greens and blue. However the symptoms will be a telltale sign for a few things. If front and rear side of the bed showing big difference, meaning Z Axis gantry isn't squared If sides vs middle is not consistent, meaning the bed might be warped...
I have an ender 3 v3 se, and Ive been looking all over online but Can’t find anywhere what type of metal the filament drive gears in the extruder are? I wanted to run carbon fiber PETG but have heard you need to make sure your gears aren’t brass. I have a steel nozzle for it already also.. Would you happen to know if they are brass gears? Thank you very much!
Don't think they are brass.. just normal metal. The hotest I ran was 260 degrees for polycarbonate.. and normal PETG.. the drive gears worked fine for both.. probably adjust the drive gear tensioner... should be OK
They appear to be steel not brass, possibly a hardened steel but they're certainly more durable than brass
All these USB types confused me.
hahah likewise.
Man, your a life saver!!!! This helped sooo much! I was so confused why it wasn't working 😅
Happy this helped! Thank You for commenting.
A filament guide with mount for runout sensor would be even better...
Yeah. Will try to get runout sensor
Muchas gracias!! Me sirvió mucho la información!! Saludos
♥️♥️♥️♥️
Thankyou this totally worked - was a bit nervous unscrewing all those screws lol - and praying you reversed it at the end so I could put it all back together again - but got the clog out and now its working perfect again.. It has given me the courage to now try on my 2 x flashforge ones lol
Great work! And yeah, way too many screws to our liking. But it is doing it's job to make the printer look nice.
Hey, may I ask you a question about the Ender 3 v3 se?
Yes whats up?
Great video. I really like how you demonstrated checking squareness.
Thank You for your comments. Yeah, ever since a nightmare built many years back, learned from that mistake and now I make sure all XYZ Printers are squared out of the box. Hahahhaa